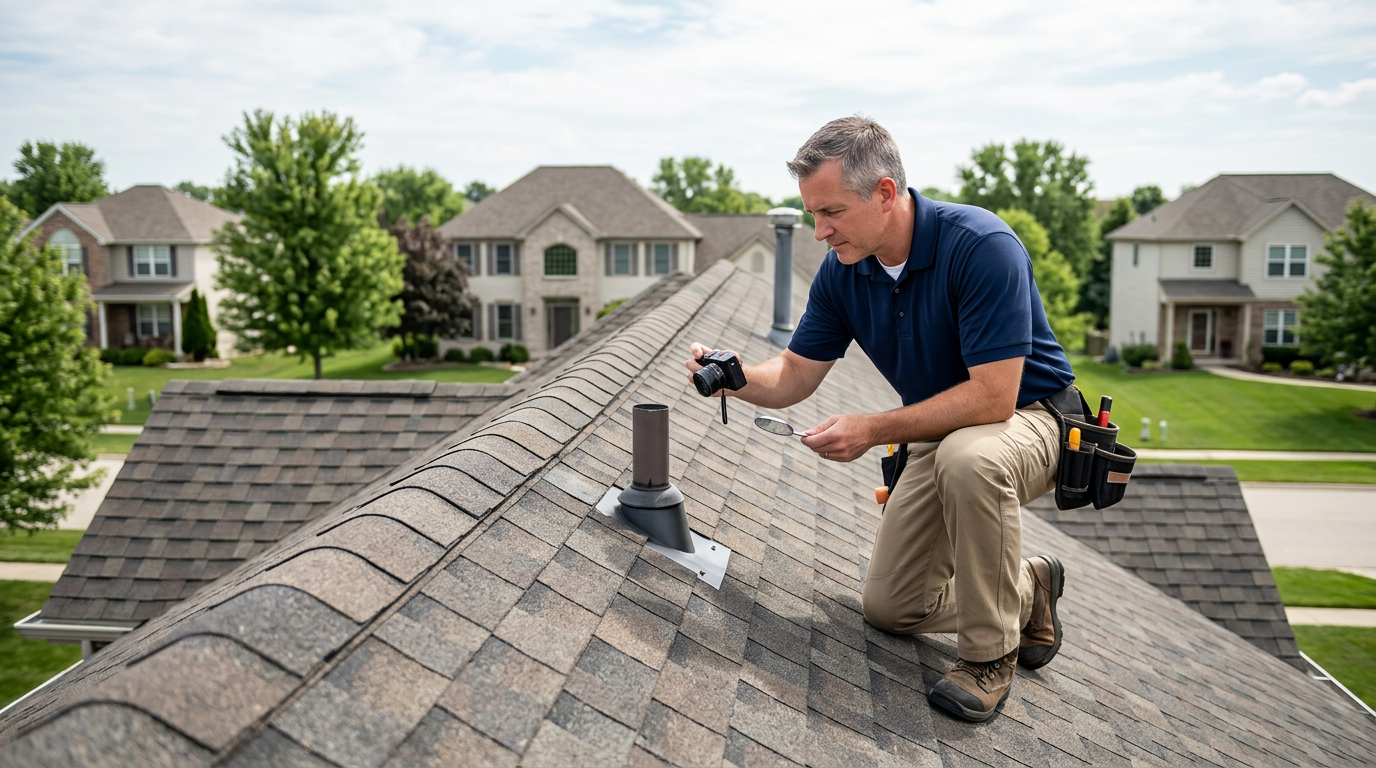
A new or recently replaced roof represents a significant investment and a critical component of a home’s protective envelope. A professional home inspection of a roofing installation goes beyond a cursory glance, systematically evaluating the quality of materials, workmanship, and adherence to accepted installation practices to ensure the roof performs its primary function: keeping the elements out. This guide will equip you with the knowledge to understand the nuances of a thorough roofing installation inspection, identify potential issues, and navigate necessary next steps.
What a Home Inspector Looks For in a Roofing Installation
During a roofing installation inspection, a qualified home inspector meticulously examines visible components of the roof system. The goal is to identify material defects, improper installation techniques, and potential vulnerabilities that could lead to premature failure or moisture intrusion. This is not a code compliance inspection, but rather an evaluation against generally accepted installation practices and the inspector’s professional judgment.
Roofing Materials and Components
- Shingles (Asphalt, Wood, Tile, Metal): Inspectors assess the condition, type, and uniformity of the roofing material. For asphalt shingles, this includes checking for proper granule adhesion, blistering, curling, or cracking. For tiles, inspectors look for cracks, chips, or dislodged units. Metal roofs are checked for proper panel alignment, secure fasteners, and sealant integrity.
- Underlayment: While often concealed, signs of improper underlayment installation (e.g., wrinkles, inadequate overlap) can sometimes be inferred from the surface or observed at eaves and rakes. In the attic, the underside of the decking is inspected for signs of water penetration that would indicate a failure of the entire system.
- Decking/Sheathing: From the attic, the inspector examines the roof decking for signs of water damage, rot, or inadequate fastening. Proper spacing and support are also noted.
Flashing Details and Penetrations
Flashing is arguably the most critical component for preventing water intrusion. Inspectors pay close attention to:
- Valleys: Open or closed valleys are inspected for proper shingle cutting, adequate overlap, and sealant application. Improperly installed valley flashing is a common source of leaks.
- Chimneys: Step flashing and counter-flashing around chimneys are scrutinized for proper layering, secure attachment, and effective sealing.
- Vents (Plumbing, Exhaust, Attic): All roof penetrations, including plumbing vent pipes, exhaust vents (bathroom, kitchen), and attic vents, must be properly flashed and sealed to prevent water entry.
- Skylights: Skylight flashing kits are designed to integrate with the roofing material. Inspectors check for proper installation, sealant integrity, and signs of past or present leaks around the frame.
- Wall Abutments: Where a roof meets a vertical wall, step flashing and counter-flashing are essential. Improper installation here can lead to significant moisture intrusion into wall cavities.
Ventilation System
Adequate attic ventilation is crucial for the longevity of the roof system and the energy efficiency of the home. Inspectors evaluate:
- Soffit Vents: Located under the eaves, these provide intake air. Inspectors check for obstructions (e.g., insulation) and proper installation.
- Ridge Vents/Static Vents: These provide exhaust for hot, moist air from the attic. Inspectors look for proper installation, clear pathways, and damage.
- Balanced System: The inspector assesses whether the intake and exhaust ventilation appear balanced, as an unbalanced system can lead to heat and moisture buildup, potentially causing premature shingle deterioration and increasing heating/cooling costs.
Gutters and Downspouts
While not strictly part of the roof installation, gutters and downspouts are integral to effective roof drainage. Inspectors check for proper slope, secure attachment, blockages, and ensure downspouts direct water away from the foundation.
Technical Considerations and Red Flags
An expert inspector understands that many roofing issues stem from subtle installation errors. Here are key technical considerations and red flags:
- Improper Fastening: Nails that are overdriven, underdriven, or exposed can compromise shingle integrity and lead to leaks. Nail pops can indicate movement or improper decking.
- Inadequate Overlap/Exposure: Shingles must be installed with specific overlap and exposure to ensure water sheds correctly. Incorrect application can create pathways for water.
- Missing or Damaged Flashing: Any area where flashing is missing, bent, or improperly sealed is a direct red flag for potential moisture intrusion. This is often observed around chimneys, skylights, and valleys.
- Poor Attic Ventilation: Signs of inadequate ventilation in the attic include excessive heat, moisture accumulation (condensation on rafters, mold growth), and premature deterioration of roof decking or insulation. A thorough attic inspection is critical here.
- Ponding Water: On low-slope or flat roofs, standing water (ponding) indicates improper drainage and can significantly shorten the roof’s lifespan.
- Incorrect Material Application: Using the wrong type of sealant, incompatible materials, or failing to follow manufacturer specifications can void warranties and lead to early failure.
- Visible Damage from Installation: Scrapes, tears, or excessive foot traffic marks on new shingles can indicate careless installation.
- Inconsistent Workmanship: Uneven shingle lines, crooked flashing, or mismatched materials can point to a lack of attention to detail during installation.
Common Homeowner Mistakes That Obstruct Inspections
To ensure a comprehensive roofing installation inspection, homeowners should avoid these common pitfalls:
- Blocked Attic Access: If the attic access is obstructed by stored items, insulation, or locked, the inspector cannot evaluate the underside of the roof decking, ventilation, or signs of leaks.
- Debris on the Roof: Leaves, branches, or other debris can obscure defects, especially around flashing and in gutters.
- Lack of Maintenance Records: While not an obstruction, having records of the roof installation date, warranty, and any previous repairs can provide valuable context for the inspector.
- Pets Left Loose: While less direct for roof inspection, ensuring pets are secured prevents distractions and allows the inspector to move freely around the property, including exterior areas where roof components are visible.
- Utilities Turned Off: While less common for roof-specific issues, ensuring all utilities are active allows for a complete home inspection, which often includes evaluating exhaust fans that vent through the roof.
Repair Cost vs. Benefit & Negotiation Implications
Identifying roofing installation defects during an inspection can significantly impact a property transaction. Addressing accessible problems before an inspection, or at least being aware of them, can improve the property’s presentation and potentially reduce avoidable repair requests or price concessions.
For buyers, documented defects provide leverage for negotiation. For sellers, proactively repairing issues can streamline the sale process. Findings should be evaluated fairly and professionally:
- Minor Defects: Small issues like a few loose shingles or minor sealant touch-ups might be inexpensive to fix and can prevent larger problems.
- Moderate Defects: Improper flashing around a chimney or a poorly vented attic might require a few hundred to a few thousand dollars to correct, but the benefit of preventing extensive water damage or premature roof failure far outweighs the cost.
- Major Defects: Widespread improper shingle installation or significant structural issues related to the roof decking could necessitate a partial or full re-roof, a substantial expense. These findings often lead to significant price adjustments or demands for repair by the seller.
The key is to understand that an inspection report is a tool for informed decision-making, not a deal-breaker. It provides a basis for professional discussion and negotiation.
Printable Home Inspection Checklist: Roofing Installation
Use this checklist to prepare for or review aspects of a roofing installation inspection:
- Exterior Visual Check:
- ✓ Walk around the perimeter of the house, looking for obvious signs of damage or poor workmanship on the roof.
- ✓ Note any missing, cracked, or curled shingles/tiles.
- ✓ Observe the straightness of shingle lines and overall aesthetic consistency.
- ✓ Check for excessive granule loss on asphalt shingles (often visible in gutters).
- Flashing and Penetrations:
- ✓ Examine flashing around chimneys, skylights, and vent pipes for secure attachment and proper sealing.
- ✓ Look for any gaps, rust, or signs of past water staining around these areas.
- ✓ Ensure valleys appear clean and properly integrated with the roofing material.
- Gutters and Drainage:
- ✓ Clear gutters of debris to ensure proper water flow.
- ✓ Check that gutters are securely fastened and sloped correctly towards downspouts.
- ✓ Verify downspouts direct water away from the foundation.
- Attic Inspection (if safe and accessible):
- ✓ Check for signs of water stains, mold, or mildew on the underside of the roof decking and rafters.
- ✓ Ensure soffit and ridge vents are clear and unobstructed by insulation.
- ✓ Look for proper insulation levels and distribution.
- ✓ Note any unusual odors or excessive heat.
- Documentation Review:
- ✓ Gather any available records of roof installation, warranty information, and repair history.
- Clear Access:
- ✓ Ensure attic access points are clear and easily accessible for the inspector.
- ✓ Remove any obstacles around the exterior perimeter of the house that might impede ladder placement.
When to Call a Specialist
While a home inspector provides a generalist’s evaluation, certain findings warrant further investigation by a specialized trade professional:
- Significant Water Intrusion or Damage: If the inspector identifies active leaks, extensive water staining, or structural damage to the roof decking or framing, a qualified roofing contractor should be called for a detailed assessment and repair estimate.
- Suspected Structural Issues: Any concerns about the structural integrity of the roof framing (e.g., sagging, significant deflection) should prompt a consultation with a licensed structural engineer.
- Persistent Ventilation Problems: If attic moisture or heat issues persist despite apparent ventilation, an HVAC specialist or a roofing contractor experienced in ventilation solutions may be needed.
- Warranty Claims: If the roof is relatively new and defects are found, contacting the original installer or manufacturer may be necessary to explore warranty options.
Frequently Asked Questions About Roofing Installation Inspections
- Q: Can a home inspector walk on every roof?
- A: No. Home inspectors prioritize safety. They will walk on roofs that are safely accessible, not excessively steep, and where conditions (e.g., weather, material fragility) permit. If a direct walk-on is not possible, they will use ladders, binoculars, drones, or other methods to inspect from the eaves and ground.
- Q: What’s the difference between a roof inspection and a home inspection’s roof component?
- A: A home inspection includes an evaluation of the roof as part of the overall home system, focusing on its general condition and major defects. A dedicated roof inspection, often performed by a roofing contractor, is typically more granular, focusing solely on the roof’s specific components, lifespan, and repair/replacement options, often with the intent of providing a quote.
- Q: How long should a new roof last?
- A: The lifespan of a new roof varies significantly by material. Asphalt shingles typically last 20-30 years, architectural shingles 30-50 years, metal roofs 40-70 years, and tile/slate roofs 50-100+ years. Proper installation and maintenance are crucial for achieving these lifespans.
- Q: Will a home inspection tell me if my roof is up to code?
- A: A home inspection is a visual, non-invasive examination of the readily accessible components of a home, not a code compliance inspection. While inspectors are knowledgeable about common building practices and significant safety issues, determining strict code adherence is typically the role of a municipal building inspector or a qualified contractor. However, significant deviations from standard practices that impact safety or performance will be noted.
- Q: What are common signs of a poorly installed roof?
- A: Common signs include uneven shingle lines, exposed fasteners, improper or missing flashing around penetrations (chimneys, vents, skylights), visible gaps where water could enter, excessive granule loss on new shingles, and signs of water staining or mold in the attic shortly after installation.
Related Home Inspection Guide: Complete Guide to Heating System Installation Inspections
Official Reference: For additional context, consult EPA home radon guidance.
Official Reference: For additional context, consult InterNACHI home inspection guidance.